1. Applying filters
IrfanView comes with a bunch of filters that can be used to give a nice look to your photos. To easily apply filters to an image using IrfanView do the following:
Navigate to Image>Effects>Effects Browser or simply press "Ctrl+E".
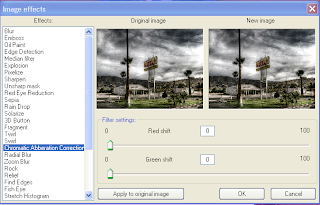
You will get a list of filters along with the preview of the image before and after applying the filters. Click on these filters to see how your image will look like before it is being applied to it. You can also adjust the filter settings by dragging the sliders associated with each filter.
To apply the selected filter click on the "Apply to original image button".
2. Color Correction

Color correction involves making changes to the overall brightness and contrast of a image. It is also used to color balance the image to compensate for any tonal deficiencies and color casts in the original image. Let us see how to do color correction in IrfanView.
To color correct a image in IrfanView chose Image>Enhance colors or press "Shift+G".

You can adjust the Brightness and Contrast of your image to make it look better. You can adjust the RGB values by dragging the Color balance sliders. To darken or lighten the midtones drag the Gamma correction slider to the left or right. You can also enter a Gamma value at the entry box to the right of the Gamma slider. To adjust the saturation of the image drag the Saturation slider.

You can see a live preview of the changes that occur to your image before it is being applied to it. To apply multiple color corrections to your image use the "Apply to image" button. To reset the changes applied to the image you click on "Set default values" button. After you are satisfied with the changes press the "OK" button to apply the changes.

3. To create Grayscale of an image

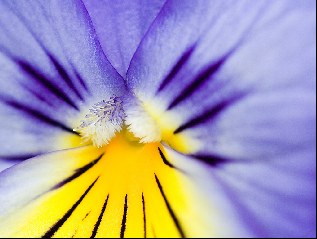
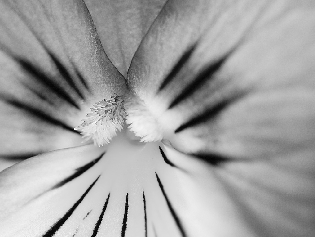
To create Grayscale of an image chose Image>Convert to Grayscale. This will help you to create black and white images from color photos.
4. To pixelize an image
Another useful option in IrfanView is that it helps you to pixelize images. It can be used if you do not want to dispay certain parts of an image.
To pixelize an image first select the region of the image you want to pixelize. Then chose Image>Effects>Pixelize.
5. To crop a image
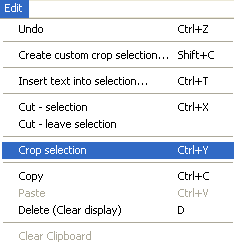
To crop a image, position your cursor on the image, then click and drag to define the crop.
Chose Edit>Crop Selection or press "Ctl+Y" to apply the crop.
6. To rotate an image

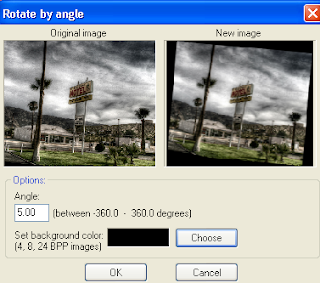
To rotate an image in IrfanView chose Image>Custom/Fine rotation. Enter value of the angle to which the image is to be rotated in the entry box. You can also set the background color of the rotated image here. Click on "Choose" to select a background color. Press "OK" to apply your changes.
7. To create a slide show
You can use IrfanView to create a slideshow and then can save it as an EXE/SCR file. To create a screensaver do the following:
Chose File>Slideshow or press "W". A dialog box will appear which allows you to add images to your slideshow.

Select a directory to add images to your slideshow. You can add all the images in a directory pressing the "Add all" button. If you want to add only a few images then you can use the "Add" button.
To add an MP3 as background music for your slideshow select an MP3 file and add it to your slideshow. Check the option "Loop MP3 files(background music)" to loop the MP3 song until the end of the slideshow.
Click on "Advanced options" to set whether the slideshow should be displayed in fullscreen, otherwise you can specify a custom size.
Now you are almost done and after specifying the time interval between each slides and a little bit tweaking you can save your slideshow. To save the slideshow click on "Save as EXE/SCR file". If you have Nero Plugin for IrfanView you can burn it to CD or create a VCD by clicking on the "Burn to CD" button.
8. Create a Panorama image.
Multiple images can be stiched together to create a large image. Such images are called panorama images. You can create Panorama images using IrfanView. To create a Panorama do the following:
Go to Image>Create panorama image.

A dialog box will appear which prompt you to enter the images to be used to create a panorama.
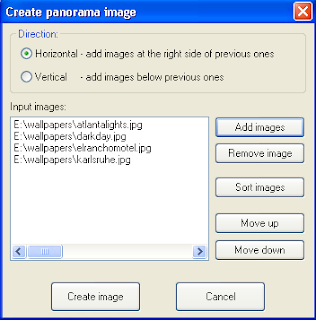
Make sure that you selected the images that closely match each other. Specify a horizondal or vertical alignment. To create a Panorama image press on "Create image" button. You have successfully created a nice looking Panorama image!
Good Luck!


0 comments:
Post a Comment